

Plugins
Rosetta plugins bundle the bootstrap rule, skills, agents, workflows, and other instructions directly into your IDE. The agent loads them locally — no live connection to Rosetta is needed at request time.
Every plugin supports two installation methods:
- Marketplace — managed install from a plugin marketplace. Easier; preferred when available.
- Standalone — manual zip extraction into your repo. For agents without a marketplace path, or environments that block external marketplaces.
[!CAUTION] You must receive prior approval from your manager and company to use Rosetta.
[!WARNING] Use Sonnet 5 medium, GPT-5.6-terra-medium, gemini-3.7-flash-high or newer models. Avoid Auto model selection.
[!NOTE] There will be conflict if you have similar plugins installed: JUXT, Superpowers, GSD, AI-DevKit. Use the ones you have the most experience with.
Step 1: Install Plugin
Claude Code
Claude Code
Marketplace
claude plugin marketplace add griddynamics/rosetta
claude plugin install rosetta@rosetta
Cursor
Cursor
Marketplace
[!NOTE] To add the plugin you need to have the appropriate Cursor plans, such as Teams and Enterprise.
To Import the Rosetta github repository to your team/company internal marketplace:
- Use the following repository: https://github.com/griddynamics/rosetta
For detailed setup instructions, see the Cursor documentation:
- https://cursor.com/docs/plugins#team-marketplaces
ALTERNATIVE: Plugins installed in Claude Code are automatically available in Cursor.
[!WARNING] Cursor automatically detects and uses Claude Code plugins. To avoid duplicate tools, commands, and context, do not install the same plugin separately in both Claude Code and Cursor. If you don’t want Cursor to pick up Claude Code plugins at all, go to Cursor Settings → Rules, Skills, Subagents and turn off Include third-party Plugins, Skills, and other configs.
Standalone
- Download
core-cursor-standalone-*.zipfrom the latest release. - Extract the archive contents into your repository.
- Verify you can see a file
.cursor/agents/architect.md. Ensure there are no.cursor/.cursorfolders.
GitHub Copilot
GitHub Copilot
GitHub Copilot runs in VS Code and JetBrains. Use Marketplace install when available; Standalone is a fallback for either IDE.
Marketplace (VS Code and JetBrains)
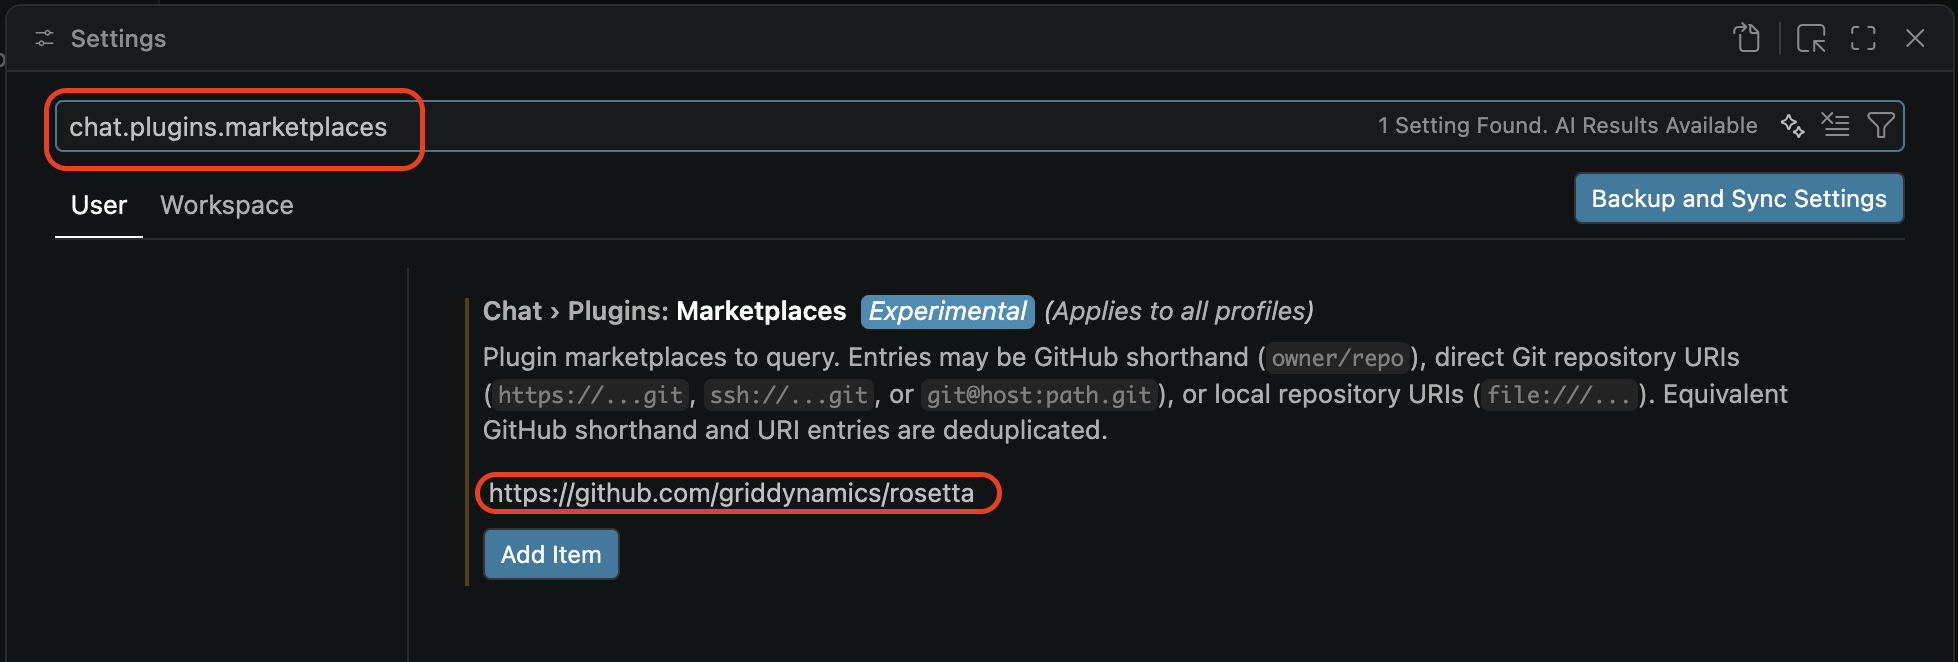
- In VS Code settings, add
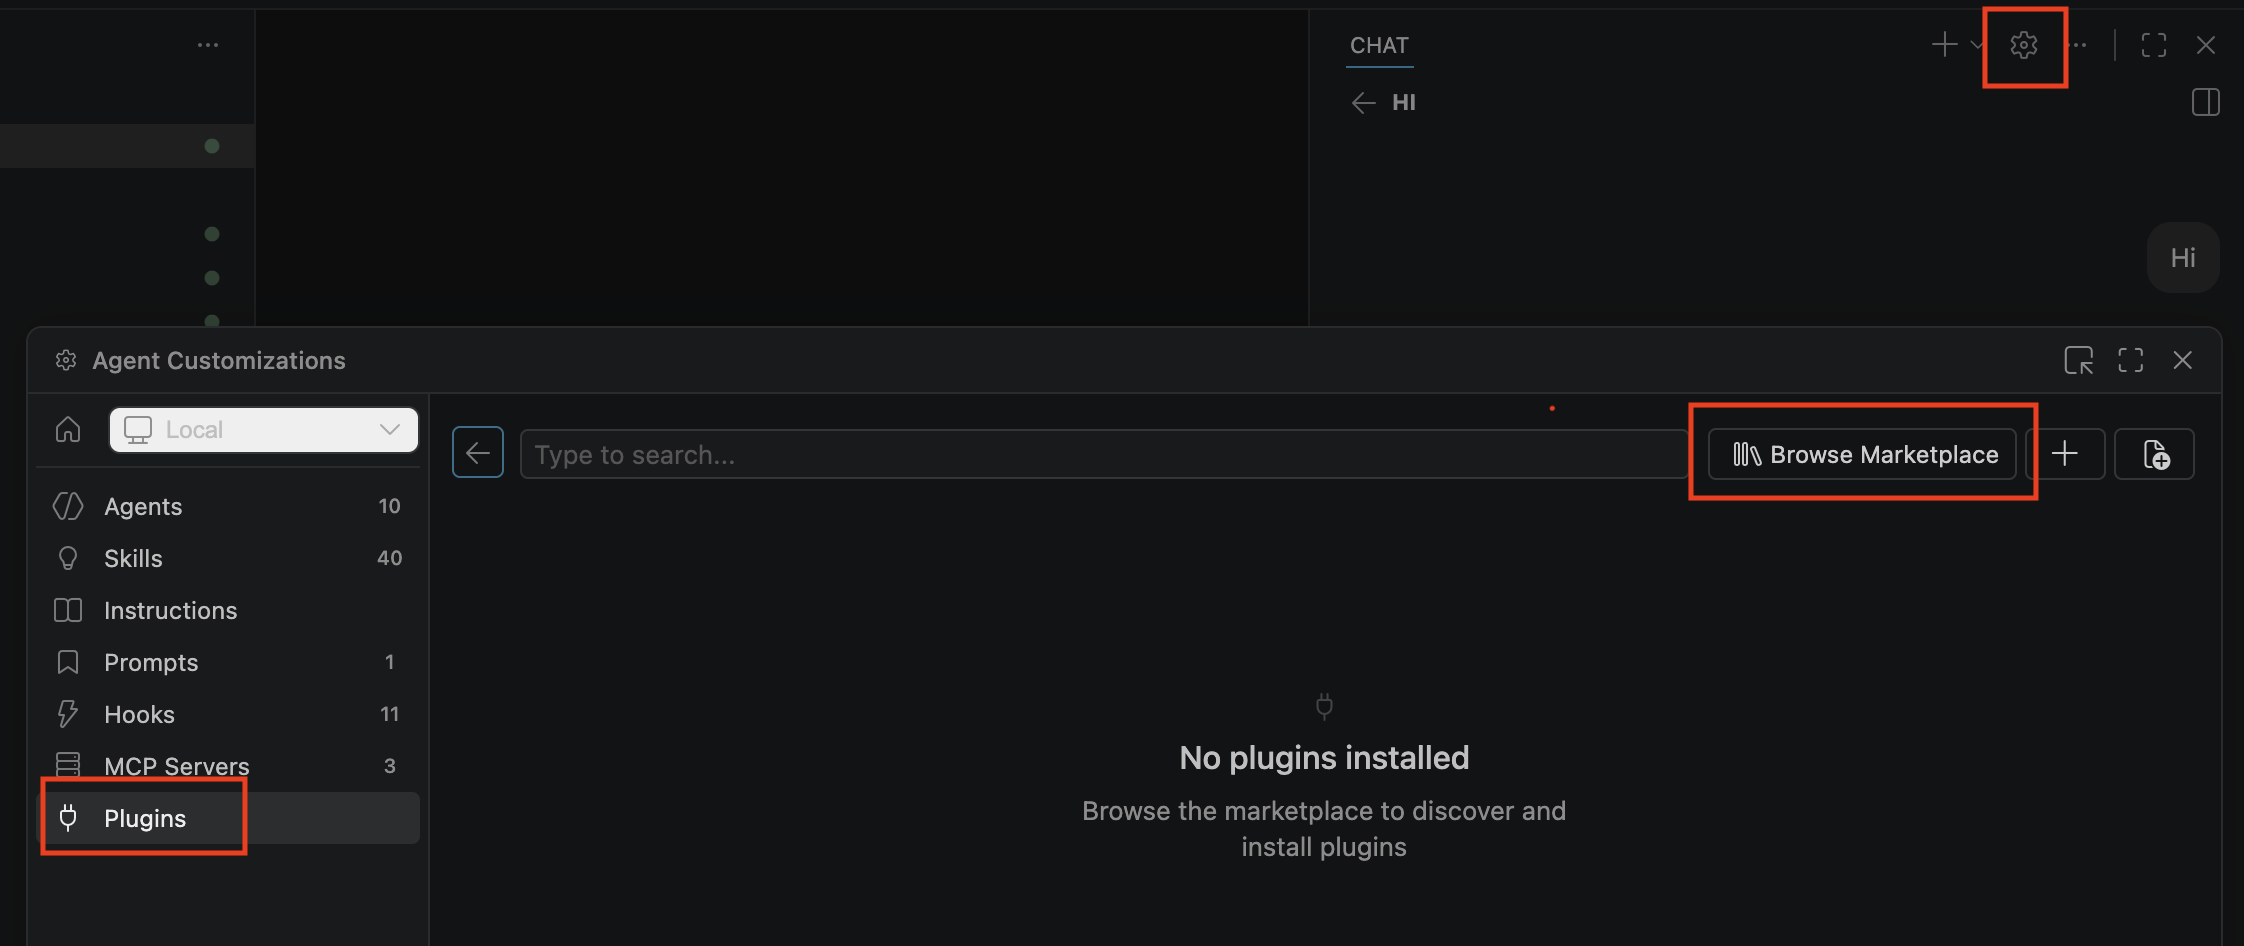
https://github.com/griddynamics/rosettatochat.plugins.marketplaces. In JetBrains, add the same URL under the GitHub Copilot plugin’s marketplace setting (menu path may vary by IDE version). - Open the Copilot chat panel, click the settings gear icon to open agent customizations.
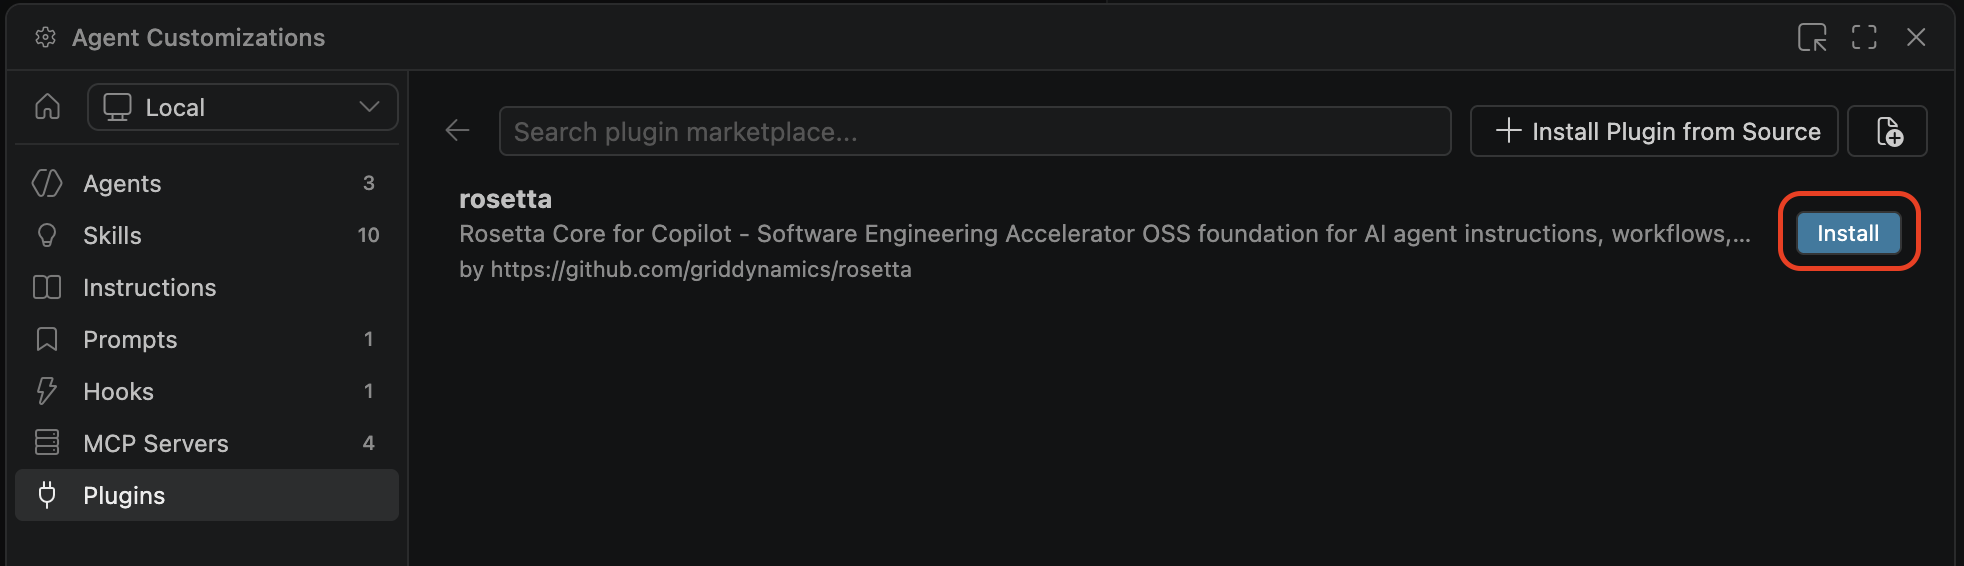
- Click Browse Marketplaces, then install for
rosetta.
Standalone (VS Code and JetBrains) — fallback
Use when your Marketplace/plugin catalog isn’t available, or to avoid a live registry dependency.
[!NOTE] The standalone installation is also detected by VS Code, so installing Rosetta through the standalone and marketplace methods will result in duplicate tools, commands, and context.
- Download
core-copilot-standalone-*.zipfrom the latest release. - Extract the archive contents into your repository.
- Verify you can see a file
.github/agents/architect.agent.md. Ensure there are no.github/.githubfolders.
Codex
Codex
[!NOTE] Codex plugins currently support hooks, MCPs, and skills only (as of April 2026).
Standalone
- Download
core-codex-*.zipfrom the latest release. - Extract the archive contents into your repository.
-
Enable hooks:
codex features enable hooks
Antigravity
Antigravity
One plugin serves Antigravity 2.0, Antigravity CLI, and Antigravity IDE.
Standalone
- Download
core-antigravity-*.zipfrom the latest release. - Create the folder
.agents/plugins/rosetta/at your workspace root. - Extract the archive contents into it.
- Verify you can see a file
.agents/plugins/rosetta/plugin.json. Ensure there are no.agents/plugins/rosetta/core-antigravityfolders.
For all workspaces instead of one, extract into ~/.gemini/config/plugins/rosetta/ — same contents.
Step 2: Verify
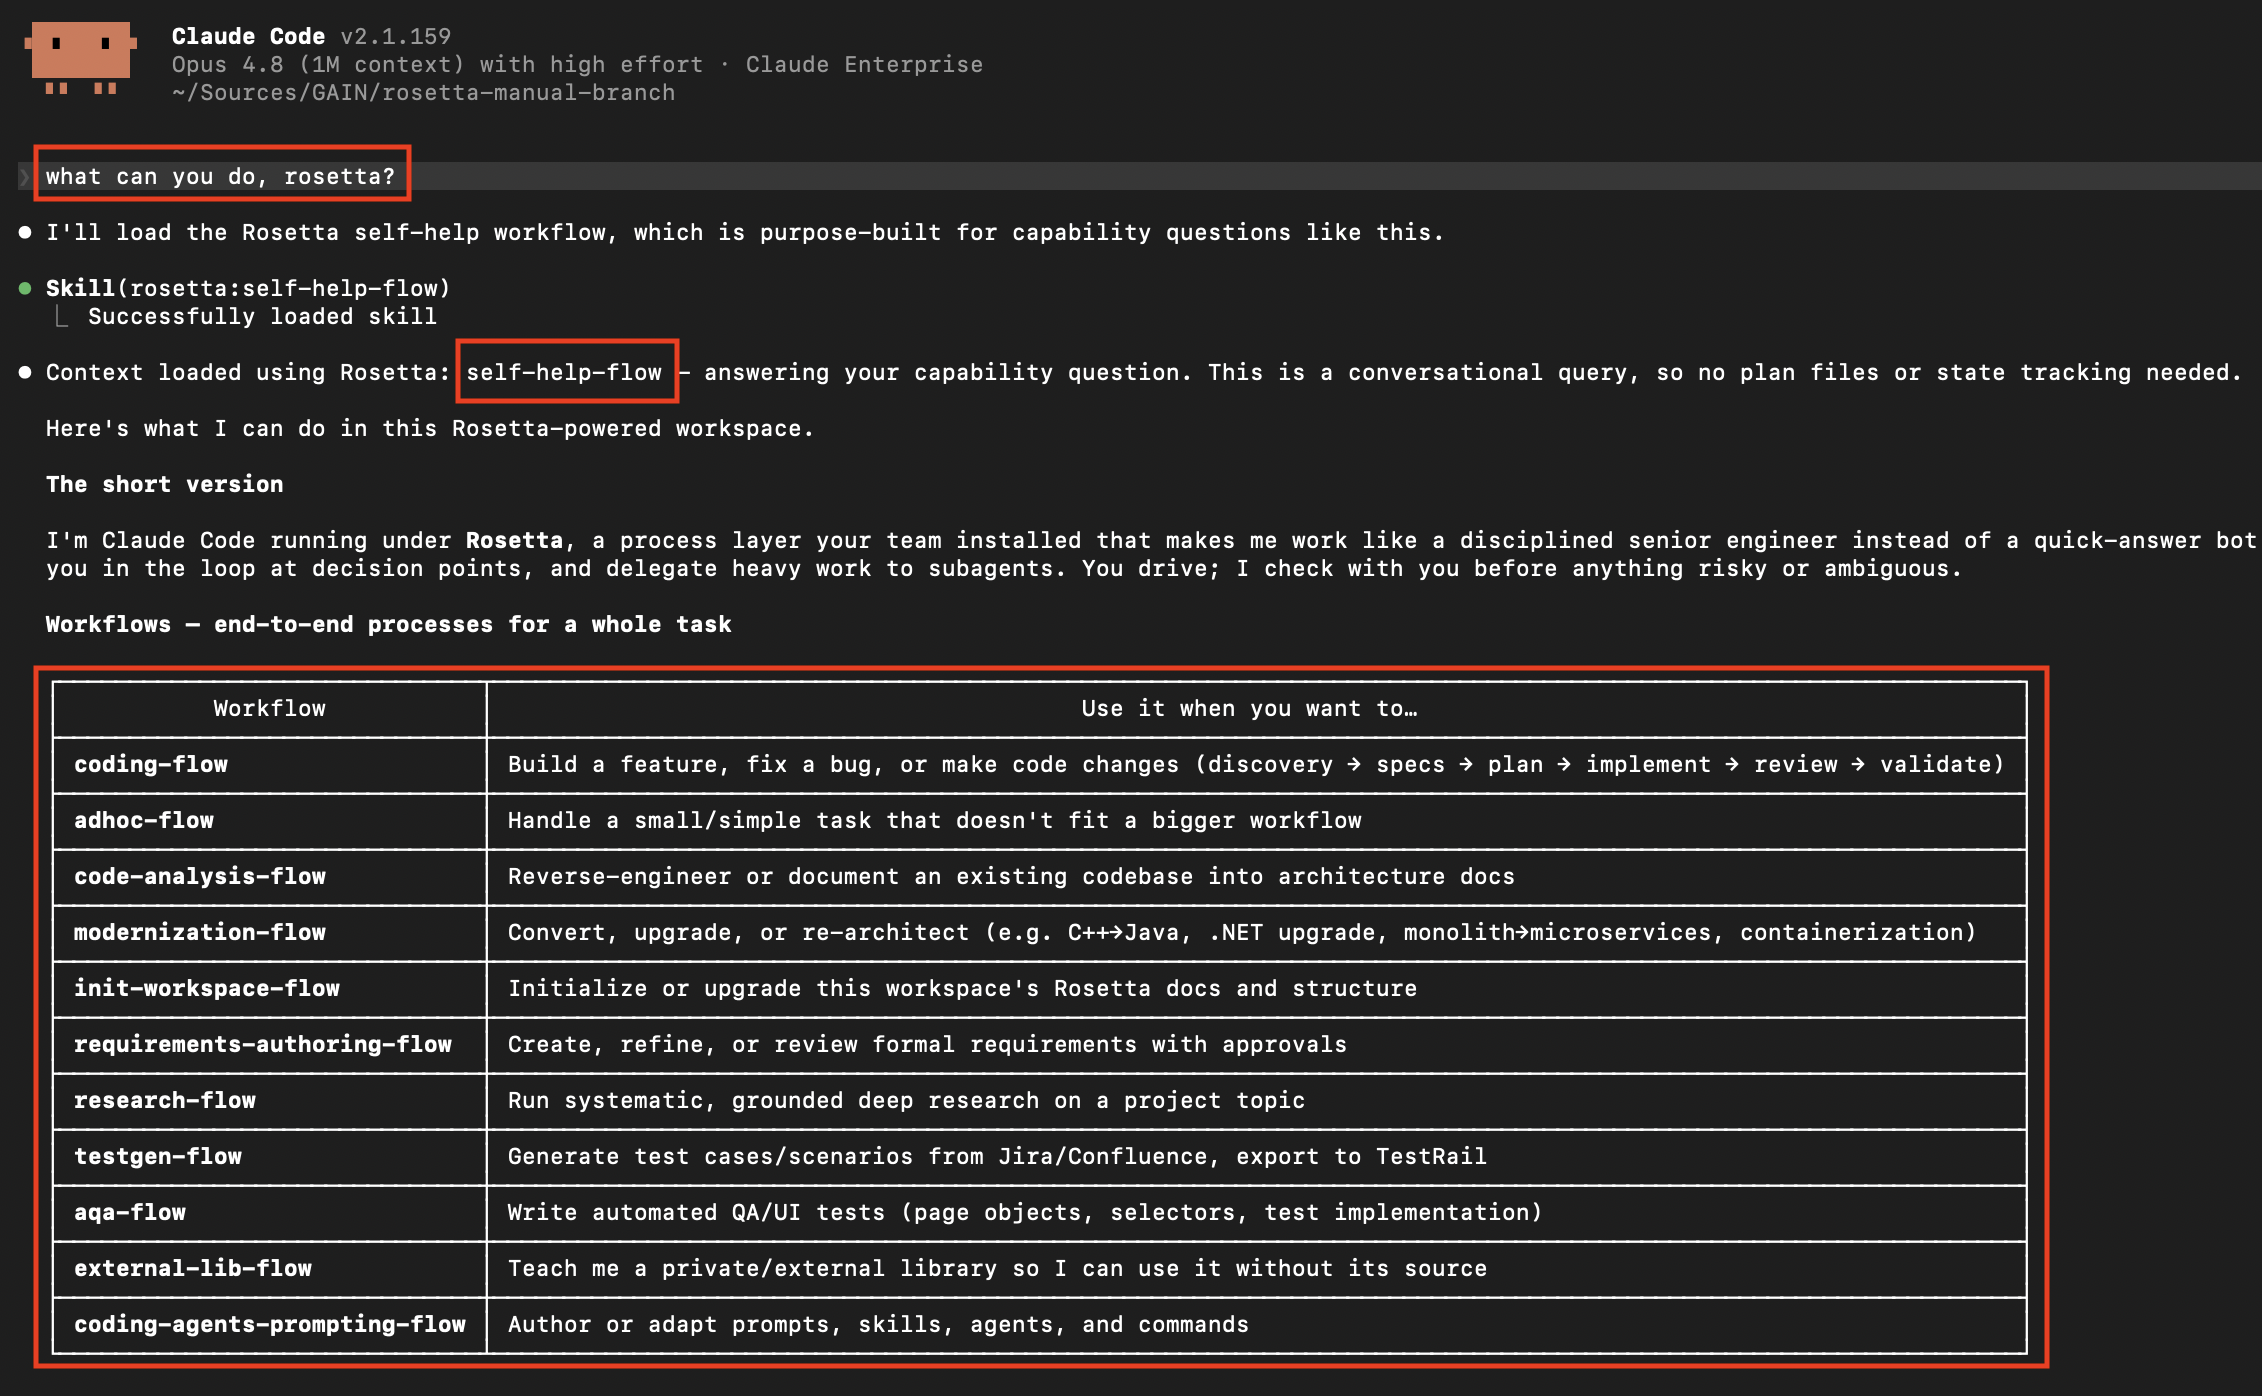
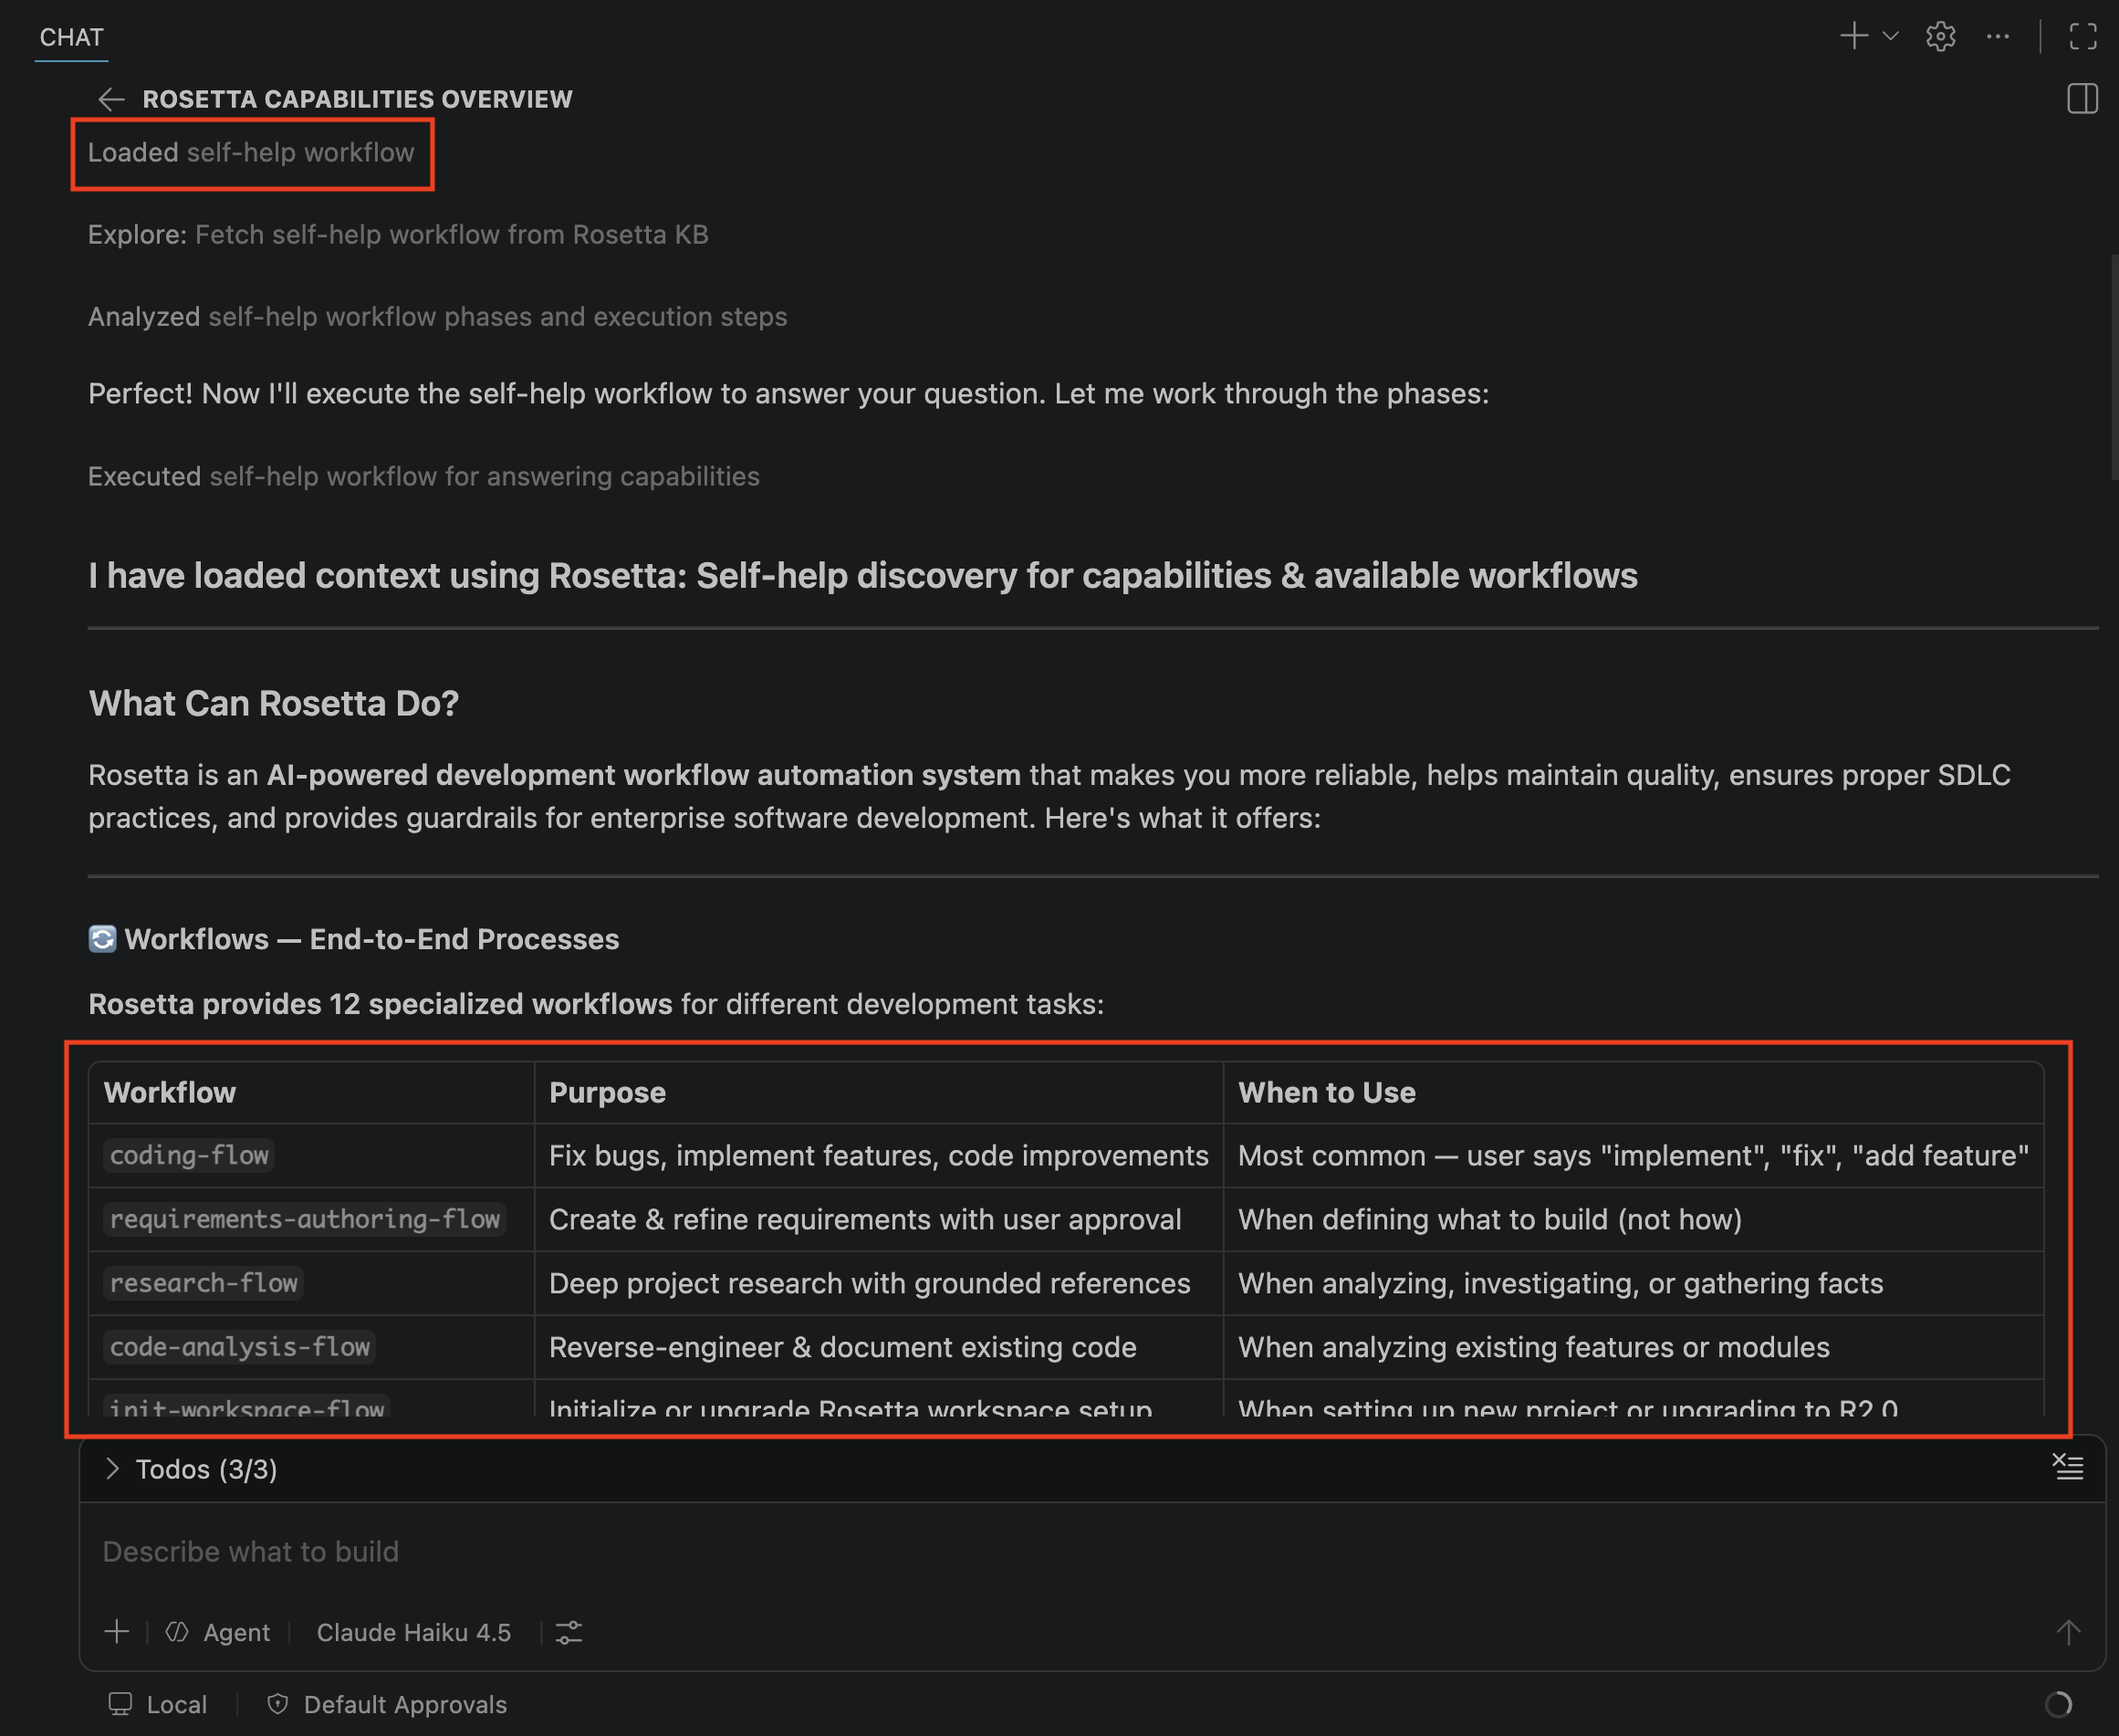
Ask the agent:
What can you do, Rosetta?
The agent will follow Rosetta prompts and show Rosetta workflows and execute help-flow (see screenshots from different tools below):
Claude Code:
GitHub Copilot:
Upgrading
- Standalone upgrades require to redownload and replace files (install again).
- Marketplace plugins usually automatically upgrade.
See INSTALLATION.md#upgrading for upgrade instructions for your installation method.
Next Steps
Once the plugin is verified:
- Run your first session and initialize the repo — see QUICKSTART.md.
- Explore the workflows (coding, requirements authoring, modernization, and more) — see USAGE_GUIDE.md — Workflows.